
Creating a home studio is a dream for many creatives, whether you’re a musician, podcaster, voice-over artist, or content creator. A well-equipped home studio allows you to produce professional-quality work without leaving your home. In this blog post, we’ll walk you through the essentials of setting up your own home studio, from choosing the right equipment to optimizing your space for sound.
Why Create a Home Studio?
- Cost-Effective: Renting studio space can be expensive. A home studio allows you to work on projects without worrying about hourly rates or availability.
- Convenience: You can create anytime, whether inspiration strikes at midnight or early in the morning.
- Creative Control: Your home studio is your personal space, allowing you to experiment and refine your craft at your own pace.
Step 1: Choose the Right Space
The first step in setting up your home studio is selecting the ideal location. Here’s what to consider:
- Quietness: Choose a room or area with minimal external noise. Avoid spaces near busy streets, noisy appliances, or high-traffic areas in your home.
- Size and Shape: A medium-sized room is ideal. Large rooms can create echoes, while very small spaces might feel cramped.
- Acoustics: Rooms with irregular shapes and few parallel walls tend to produce better sound quality, as they reduce standing waves and echoes.
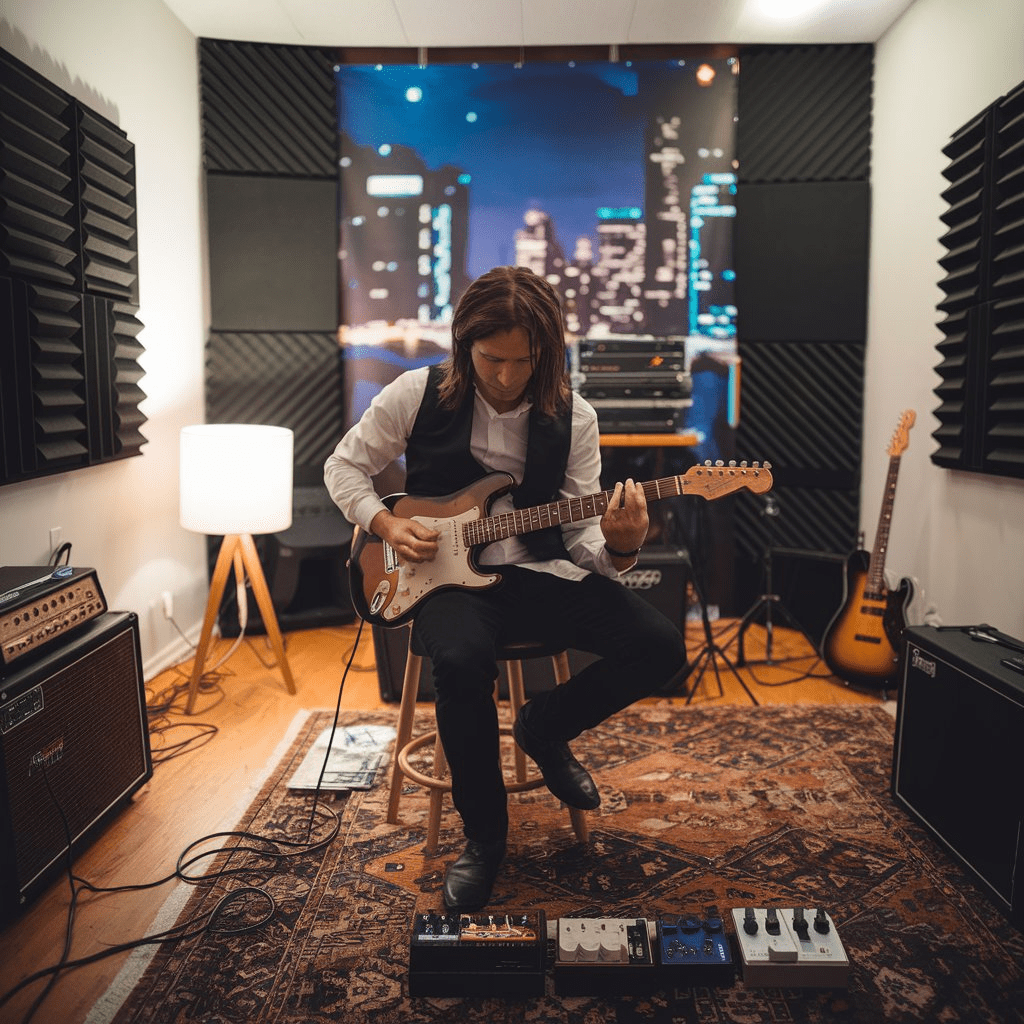
Step 2: Soundproofing and Acoustic Treatment
To achieve high-quality sound, you’ll need to minimize external noise and control the sound within your space.
- Soundproofing:
- Use heavy curtains or soundproof panels to block noise from outside.
- Seal windows and doors with weather stripping.
- Consider adding a thick rug or carpet to absorb sound.
- Acoustic Treatment:
- Install foam panels, bass traps, and diffusers to manage sound reflections.
- Place panels strategically on walls, ceilings, and corners to prevent echoes and enhance sound clarity.
Step 3: Essential Equipment for Your Home Studio
Your equipment will depend on the type of content you’re creating. Here’s a basic setup for most home studios:
1. Computer
- A reliable computer is the heart of your studio. Look for one with a fast processor and plenty of RAM to handle audio or video editing software.
2. Digital Audio Workstation (DAW)
- A DAW is software used for recording, editing, and producing audio. Popular options include:
- Ableton Live: Great for musicians and producers.
- Audacity: A free and user-friendly option.
- Adobe Audition: Ideal for podcasters and voice-over artists.
3. Audio Interface
- An audio interface connects your instruments or microphones to your computer. Look for one with multiple input and output options.
4. Microphones
- Dynamic Microphones: Durable and great for vocals, podcasts, and live instruments.
- Condenser Microphones: Sensitive and ideal for studio recording, capturing detailed sound.
5. Headphones
- Invest in closed-back headphones for recording (to prevent sound leakage) and open-back headphones for mixing (to get an accurate sound profile).
6. Studio Monitors
- Unlike regular speakers, studio monitors provide a flat frequency response, ensuring your mixes sound accurate.
7. Other Accessories
- Pop Filter: Reduces plosive sounds when recording vocals.
- Mic Stand: Keeps your microphone steady and at the right height.
- Cables and Adapters: Ensure you have high-quality XLR and USB cables for your setup.
Step 4: Setting Up Your Workspace
Once you have your equipment, it’s time to arrange your workspace:
- Desk Setup: Place your computer, audio interface, and other essentials on a sturdy desk.
- Monitor Positioning: Set up studio monitors at ear level, angled toward you in an equilateral triangle configuration.
- Cable Management: Use cable organizers to keep your workspace tidy and prevent tangling.
Step 5: Optimizing Your Workflow
To make the most of your home studio, focus on efficiency and comfort:
- Create a Workflow: Establish a routine for recording, editing, and finalizing your projects.
- Backup Your Work: Use external drives or cloud storage to save your files and avoid data loss.
- Stay Organized: Label your files and maintain an orderly project folder system.
Step 6: Upgrading Over Time
As your skills grow, you may want to upgrade your home studio. Here are some advanced tools to consider:
- MIDI Controller: For music production, a MIDI controller lets you play virtual instruments.
- External Preamp: Enhance the sound quality of your microphones.
- Advanced Plugins: Expand your DAW’s capabilities with specialized plugins for mixing, mastering, or adding effects.
Conclusion
Setting up a home studio is an exciting journey that can unlock your creative potential. With the right space, equipment, and mindset, you can produce high-quality work from the comfort of your home. Whether you’re recording your next hit song, hosting a podcast, or producing voice-over content, your home studio will be a valuable investment in your creative future.


Leave a Reply